Testing the Limits: Surface Finish Analysis of Pocket NC Machines
We often get asked what surface finish the Pocket NC machines can achieve. And while we have known, and seen, that the machine can produce a near-mirror surface finish, we have never taken the time to put an official number to it.
With the addition of a few new team members, we finally had the ability to put some time into finding this value, so that is what I set out to do.
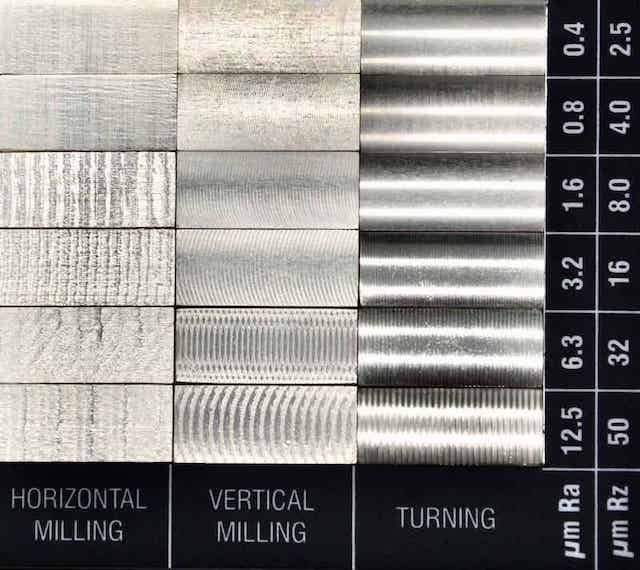
Surface Roughness Scale
I figured doing these tests in metal would be the most applicable and give me the clearest results, so I snagged a piece of brass we had laying around and got it loaded in the machine.
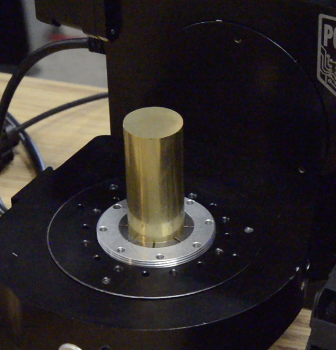
1” brass stock held in the ER40 Collet Fixture
The Datron tooling we carry has proven to create a nice surface finish on other projects, so I used a 4mm single flute endmill for this test as well.

To keep the testing simple and quick, I threw together a quick model of a cube. This allowed me to create two different types of toolpaths - one where I was cutting with the end of the tool and one where I was cutting with the side of the tool. And with the four sides, I was able to try two different speed and feed recipes each time.

Toolpaths for cutting with the end of the tool

Toolpaths for cutting with the side of the tool
Since we have seen nice results in the past, I started by using my go-to speed and feed recipe on both cutting orientations.

Cutting with the end of the tool
The results were really nice looking for both orientations so I brought our surface finish scale to the part and started comparing the newly cut surfaces to the various swatches on the scale.
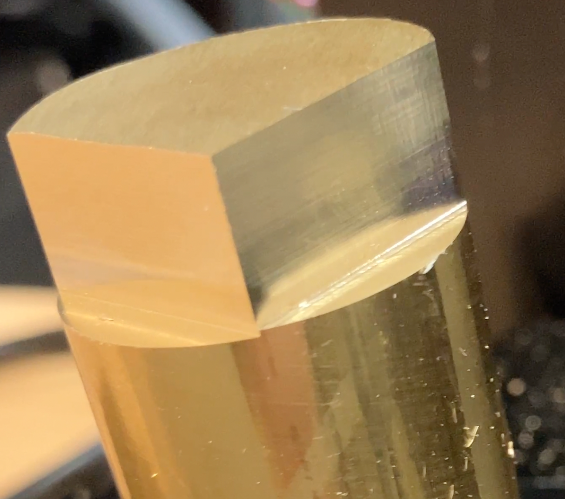
First set of results
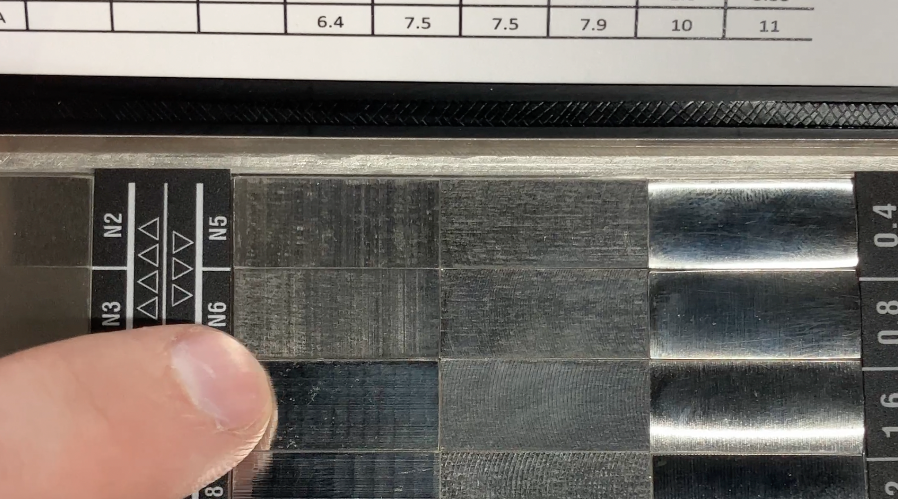
Using the roughness scale to determine Ra value
After repeating this process a few more times with slight tweaks to the speed and feed recipe, I took the best looking surfaces back to the surface finish scale and compared.

Second round of cutting with new speeds and feeds
In the end, the best surface finish I achieved with this combination of tool, setup and material was about 0.6 micron Ra, while cutting with both the end of the tool and the side of the tool.

Best looking cut compared to the roughness scale
This was a simple test but it gave us some great results that we are excited to share with existing and future users. I hope you enjoyed coming along for the ride!
Until next time, Happy Machining!